 Save
Save I still remember the December afternoon when my grandmother first taught me how to build a gingerbread house frame. The kitchen smelled impossibly warm—brown sugar, molasses, and spices dancing together—and she explained that this wasn't just about creating something beautiful, but about building a memory that would last far longer than the treat itself. Years later, I realized she was right. This edible centerpiece has become my favorite way to transform a simple dessert into a moment of pure holiday magic.
I'll never forget the year my sister brought her new boyfriend to our holiday gathering. He watched me assemble the gingerbread house frame, piece by piece, and by the time I'd added the final white chocolate drizzle, he was asking if he could help arrange the cookies around the base. That house became the centerpiece of our evening, and we all spent dessert time breaking bits off and sharing stories. It taught me that the best recipes are the ones that bring people together.
Ingredients
- All-purpose flour (300g): This is your structural foundation, creating the walls that will hold everything together. I learned to sift it with the spices so they distribute evenly, which prevents any bitter pockets of spice.
- Brown sugar (100g): This brings moisture and depth, unlike white sugar. The molasses notes in brown sugar echo the molasses in your dough, creating a harmonious flavor throughout.
- Unsalted butter (100g), softened: Room temperature is absolutely essential here—cold butter won't cream properly with the sugar, and you'll lose that light, tender crumb that makes this work.
- Molasses or dark honey (100g): This is the soul of gingerbread. Don't skip it or substitute it lightly. Molasses gives you that deep, almost caramel-like richness that plain sugar simply cannot.
- Large egg (1): This binds everything together and adds structure, helping your panels stand firm when assembled.
- Ground ginger (1 tsp): Use fresh ground if you can find it—the flavor is so much brighter and warmer than old spice.
- Ground cinnamon (1 tsp): This is what makes people close their eyes and say 'holiday' the moment they taste it.
- Ground cloves (½ tsp): A little goes a long way here. Cloves can overpower if you're not careful, but this measure is just enough to add intrigue without dominating.
- Baking soda (½ tsp): This helps the dough rise just slightly and contributes to that gentle snap when you bite into it.
- Salt (¼ tsp): Never skip salt in sweet recipes—it balances and amplifies all the other flavors.
- Egg white (1) for royal icing: This needs to be completely clean and free from any yolk, or your icing won't whip up properly. I learned this the hard way.
- Powdered sugar (200g), sifted: Sifting is not optional here. Lumps will give you grainy icing, and you want that smooth, glossy perfection.
- Lemon juice (½ tsp): Just enough to brighten the icing and help it set, without making it taste lemony.
- White chocolate (50g), melted: This becomes your artistic flourish and gentle adhesive. Temper it gently so it stays workable.
- Assorted candies and decorations: Let yourself have fun here. Chocolate buttons, white sprinkles, mini marshmallows—choose whatever makes your heart happy.
Tired of Takeout? 🥡
Get 10 meals you can make faster than delivery arrives. Seriously.
One email. No spam. Unsubscribe anytime.
Instructions
- Prepare Your Foundation:
- In a large bowl, cream together the softened butter and brown sugar. Take your time with this—you want it light, fluffy, and almost pale. This usually takes about three minutes with an electric mixer, and you'll see the texture transform as you work. It should look like wet sand that's ready to hold a shape.
- Add the Soul:
- Now add your egg and molasses, mixing well until everything is combined. The mixture might look a bit broken or separated at first, but keep mixing—it will come together. This is where your dough starts smelling like holiday magic.
- Combine the Dry Elements:
- In a separate bowl, whisk together the flour, ginger, cinnamon, cloves, baking soda, and salt. Whisking these together before adding them prevents streaks of spice and ensures every bite tastes balanced. You'll notice the mixture becoming fragrant as you whisk—that's your signal everything is well combined.
- Bring It Together:
- Gradually add your dry ingredients to the wet mixture, stirring gently but steadily. The dough will go from shaggy to smooth, and when it's ready, you'll be able to gather it into a ball. Wrap it tightly in plastic and refrigerate for at least thirty minutes. This resting time is crucial—it lets the spices bloom and makes the dough less sticky to work with.
- Heat and Prepare:
- Preheat your oven to 180°C (350°F) and line a baking sheet with parchment paper. This temperature is gentle enough to bake your panels evenly without the edges darkening too quickly.
- Roll and Shape:
- On a lightly floured surface, roll out your chilled dough to about 5 mm thickness. This thickness is key—too thin and your panels will be fragile, too thick and they won't bake evenly. Using templates (or carefully cutting with a sharp knife), create your house pieces: a front, back, two sides, and two roof panels, each roughly 10–12 cm. You can print templates online or make your own from cardboard. The precision here matters because you want everything to fit together snugly.
- Bake to Perfection:
- Place your cut pieces on the prepared baking sheet and bake for 10–12 minutes. You're looking for the edges to be just firm—not soft, not dark golden. The centers should still feel slightly tender when you press them gently. Remove from the oven and let them cool completely on a wire rack. This cooling is essential; the pieces will firm up further as they cool, and you need that firmness for assembly.
- Create Your Adhesive:
- For the royal icing, beat your egg white until soft peaks form—this usually takes about two minutes. Gradually add your sifted powdered sugar while beating, then add the lemon juice. Continue beating until you have a thick, glossy icing that holds stiff peaks. This is your edible glue, so the consistency matters. If it's too soft, add a touch more powdered sugar. If it's too stiff, add a tiny drop of water.
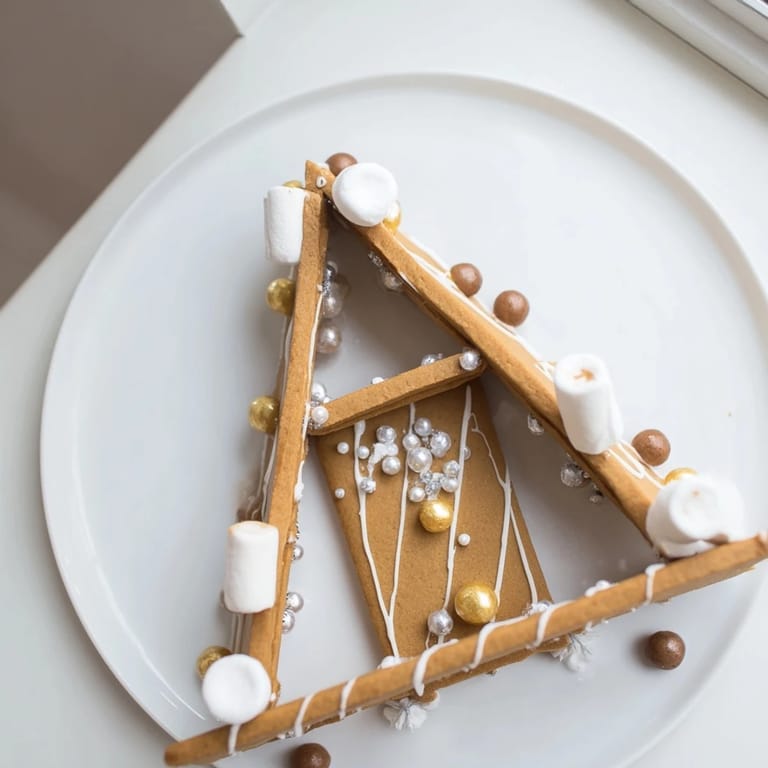
- Assemble With Care:
- This is where patience becomes your greatest ingredient. Using a piping bag or small spatula, apply royal icing to the edges of your gingerbread pieces. Press the front panel to one side panel, holding it briefly until it feels stable. Repeat with the other side, then the back panel, supporting each piece as the icing sets. Add your roof panels, leaning them together to create that classic peaked roof shape. Allow the entire structure to dry fully—at least thirty minutes, though overnight is better. You'll know it's ready when the structure feels completely solid and you can gently shake the platter without anything shifting.
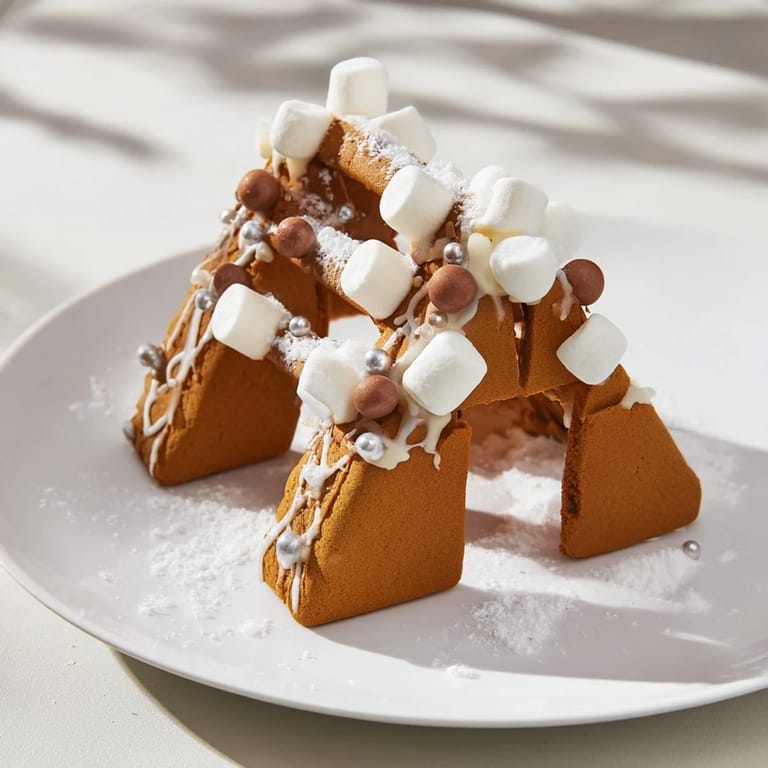
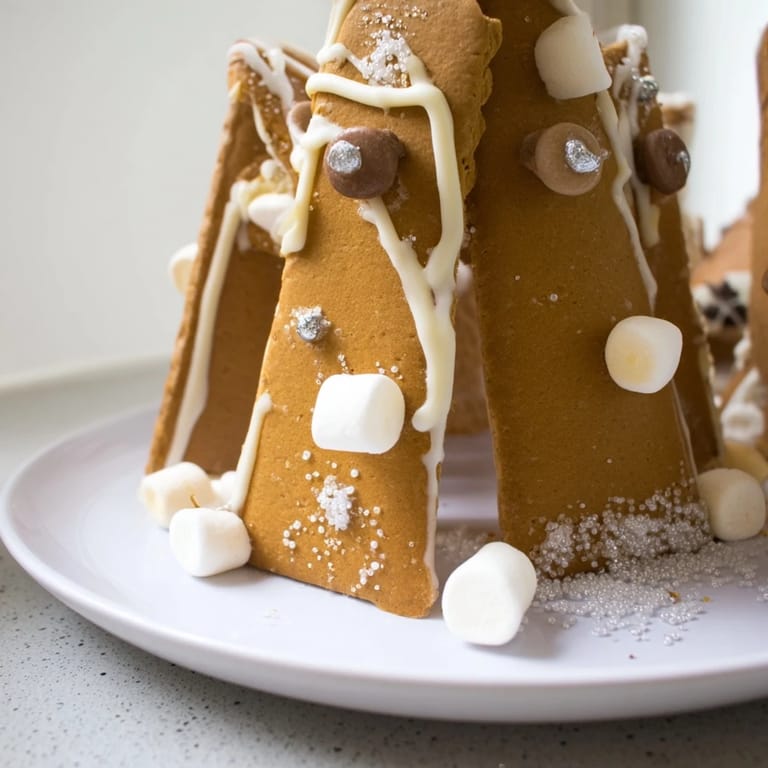
- Decorate With Joy:
- Now comes the fun part. Drizzle melted white chocolate along the edges and roof line, letting it dribble down slightly for that snowy effect. Use more royal icing to stick on your candies—chocolate buttons along the front like windows, mini marshmallows piled on the roof, white sprinkles scattered everywhere. Dust with edible glitter if you're feeling festive. There's no wrong way to do this; trust your instincts and let your personality shine through.
- Create Your Festive Border:
- Once your gingerbread house frame is completely set and firm, place it on your serving platter. Arrange additional cookies, nuts, dried fruit, or holiday treats around the base of the house, creating a beautiful edible border that frames your creation. This is your moment to be creative—arrange it until it makes you smile.
 Save
Save There was a moment last year when a seven-year-old asked if she could help me decorate the house frame. We spent an hour choosing where each candy should go, and she created this chaotic, beautiful masterpiece that I thought was perfect. When her grandmother saw it, she said it was the most beautiful gingerbread house she'd ever seen. That's when I truly understood that this recipe isn't about perfection—it's about the memories you're creating while you make it together.
The Art of Planning Ahead
One of my favorite discoveries was that you can bake the gingerbread panels a full day before assembling. Store them in an airtight container, and they'll stay perfectly crisp and ready to work with. This completely changed how I approach holiday baking, because instead of rushing through everything on one afternoon, I can spread the joy across two days. The panels even taste slightly better the next day—the spices have more time to fully develop and meld together.
Playing With Color and Flavor
While the classic brown and white color scheme is stunning, I've learned that adding a tablespoon of cocoa powder to your dough deepens the brown color to almost chocolate-like tones, which looks absolutely stunning when decorated with white chocolate and candies. For those avoiding eggs, swap the royal icing for an aquafaba version—three tablespoons of aquafaba (the liquid from a can of chickpeas) beaten with powdered sugar creates an icing that's nearly identical in texture and performance.
Pairing and Presentation
This gingerbread house frame becomes even more magical when you pair it with something warm and comforting. Mulled wine and hot chocolate are traditional choices, but I've also served it with spiced coffee and cold champagne, depending on the mood of the gathering. The frame itself can sit beautifully on your table for several days if kept in a cool, dry spot—it actually gets a bit more firm and snappy with time. One final tip: serve smaller bites by breaking the gingerbread panels into pieces rather than trying to cut clean slices, which can cause structural damage.
- Make a simple vanilla or cinnamon cream cheese dip to serve alongside—it complements the spiced gingerbread beautifully
- Keep your leftover royal icing refrigerated in an airtight container for up to a week, and you can use it to repair any cracks that develop
- If your gingerbread frame develops soft spots, it means humidity is affecting it, so move it to a drier location or cover loosely with a cake dome
 Save
Save Building a gingerbread house frame has become my favorite way to celebrate the season, and I hope it becomes part of your holiday traditions too. It's a recipe that rewards patience with beauty, and every single time you make it, you'll create something uniquely your own.
Recipe Questions
- → What spices are used in the gingerbread dough?
The dough incorporates ground ginger, cinnamon, and cloves for that classic festive flavor.
- → How do I assemble the gingerbread house frame?
Use royal icing as an edible glue to attach the side, front, back, and roof panels, holding them until set and allowing drying time for sturdiness.
- → Can I prepare the panels ahead of time?
Yes, baking the panels a day early and storing them airtight helps achieve firm edges and easier assembly.
- → What decorations enhance the frame’s appearance?
Melted white chocolate drizzles, assorted white and brown candies, sprinkles, and edible glitter create a festive look.
- → Are there any allergen considerations?
The dough contains gluten, egg, and dairy. Verify candy decorations for additional allergens before use.
- → How thick should I roll out the dough panels?
Roll the dough to about 5 mm thickness to ensure proper baking and stability.