 Save
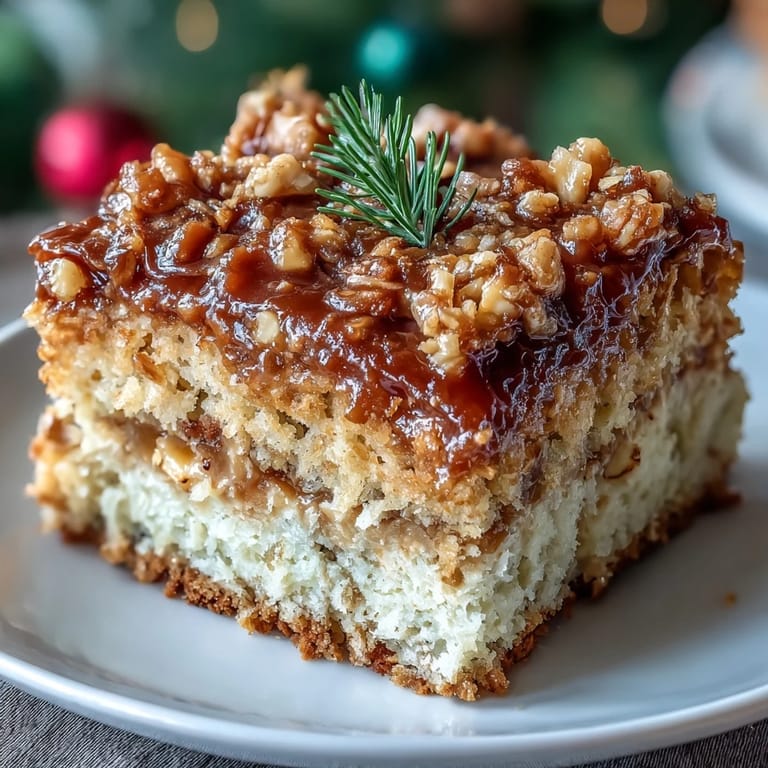
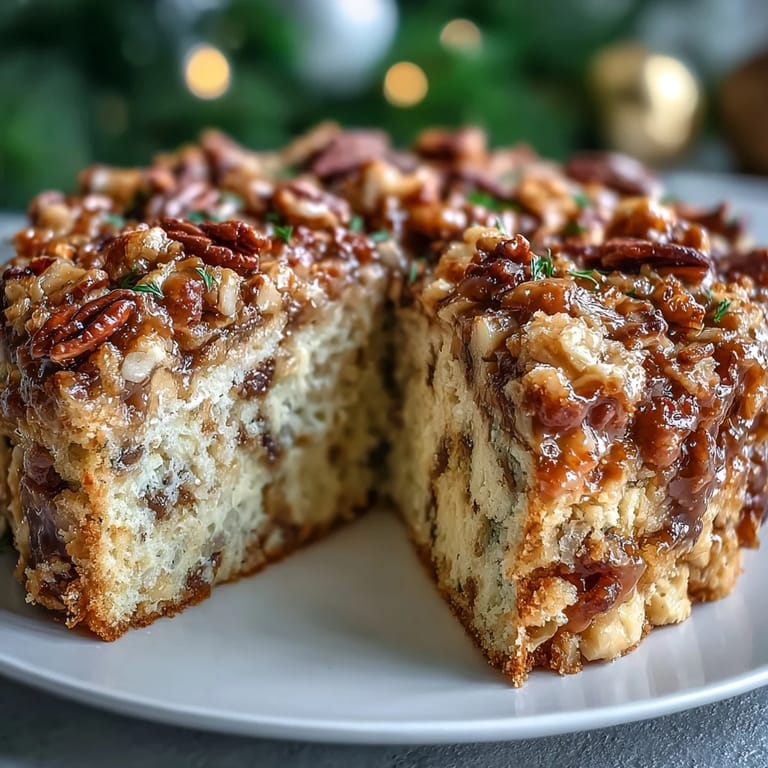
Save My sister called me three days before Christmas asking if I could bring dessert, and I nearly panicked until I remembered this toffee crunch cake—the one that somehow feels both fancy enough for the fancy dinner table and casual enough that you can eat it standing at the kitchen counter at midnight. The first time I made it, I wasn't even looking for a showstopper; I just wanted something that wouldn't stress me out, and this cake delivered in a way that surprised everyone, including me. There's something about the way those toffee bits catch the light and the nuts add that satisfying crunch that makes people think you spent all day in the kitchen. Spoiler: you didn't.
I'll never forget watching my nephew's face light up when he bit into a slice at our Boxing Day gathering last year—he immediately wanted seconds and declared it better than the store-bought cake from two years prior, which his mom had been quietly bragging about. That moment taught me that sometimes the best recipes are the ones that don't announce themselves with complicated techniques or ingredients you can't pronounce. They just show up, taste incredible, and make people feel genuinely happy.
Ingredients
- All-purpose flour (2 cups): The foundation of everything—use a gluten-free blend if you need to, but measure by spooning into a cup and leveling rather than scooping, or you'll end up with a dense cake that nobody wants to eat.
- Baking powder (1 teaspoon): This is your lift and lightness; don't skip it or reduce it thinking you're being creative.
- Salt (½ teaspoon): Just a whisper, but it makes the toffee flavor sing louder than it would on its own.
- Unsalted butter, softened (1 cup): The secret to creaming is patience—take the butter out an hour before you start and let it actually soften so it incorporates air and doesn't turn into a greasy mess.
- Sugar (1 cup): Granulated white sugar works perfectly here; don't overthink it with alternatives.
- Large eggs (4): Room temperature is the move if you want them to blend smoothly into the butter mixture and create a stable emulsion.
- Vanilla extract (1 teaspoon): Real vanilla makes a noticeable difference; the imitation stuff tastes tinny by comparison.
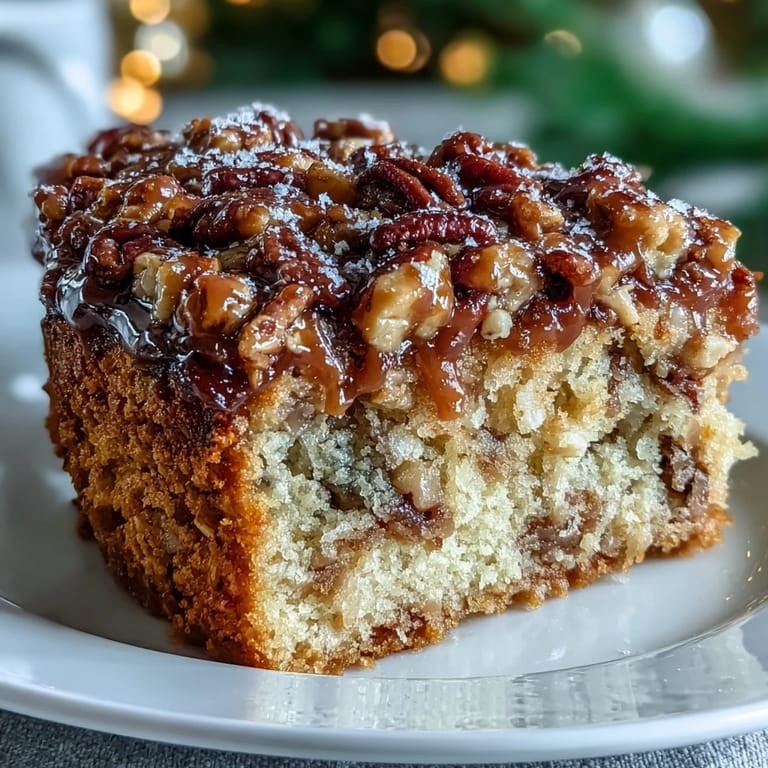
- Toffee bits (1 cup): These are the stars of the show, so buy quality ones from a baking section or online—the cheap ones can taste waxy and artificial.
- Chopped nuts, pecans or walnuts (1 cup): Toast them lightly beforehand if you want their flavor to really pop, or leave them raw if you prefer a subtle crunch.
Tired of Takeout? 🥡
Get 10 meals you can make faster than delivery arrives. Seriously.
One email. No spam. Unsubscribe anytime.
Instructions
- Prep and preheat:
- Measure everything out and lay it on the counter where you can see it—this sounds fussy but it keeps you from panicking halfway through. Pop your oven to 350°F and let it come to temperature while you grease and flour those cake pans with precision.
- Cream the butter and sugar:
- Beat them together for at least three minutes until the mixture looks pale, fluffy, and almost mouselike; this is where the magic happens, so don't rush it or your cake will be dense and sad. Stop and scrape down the bowl halfway through so everything blends evenly.
- Add eggs and vanilla:
- Drop each egg in one at a time and mix well between additions so the mixture stays emulsified and creamy. Once all four eggs are in, add your vanilla and give it another good mix.
- Combine dry ingredients separately:
- Whisk flour, baking powder, and salt together in another bowl so the baking powder distributes evenly and you don't end up with surprise pockets of bitterness.
- Bring wet and dry together:
- Alternate adding the dry mixture and mixing on low speed—add a third of the flour mixture, mix, add a third more, mix, then the last third—and stop as soon as everything is just combined. Overmixing develops gluten and makes the cake tough and unpleasant.
- Fold in the good stuff:
- Gently fold in your toffee bits and chopped nuts with a rubber spatula, being careful not to deflate all that air you just worked so hard to incorporate.
- Fill and bake:
- Divide the batter evenly between your prepared pans—use an ice cream scoop or measuring cup to keep them level—and bake for 25 to 30 minutes until a toothpick comes out clean. The edges should pull away slightly from the pan and the top should spring back when you touch it gently.
- Cool with patience:
- Let the cakes sit in their pans for ten minutes so they firm up enough to handle, then turn them out onto wire racks and let them cool completely. This step feels slow, but rushing it results in a crumbly, falling-apart mess.
 Save
Save There's something oddly comforting about sliding this cake into the oven and knowing that in less than an hour, you'll have created something that tastes like celebration and feels like home. Every time I bake it, I'm reminded that the best food doesn't need to be complicated—it just needs to be made with intention and shared with people you care about.
Frosting and Serving Suggestions
This cake is delicious on its own, but if you want to gild the lily, a caramel frosting or cream cheese frosting turns it into something truly decadent. I've also had success with a simple buttercream tinted to match your holiday theme—nothing fancy, just butter, powdered sugar, and vanilla that lets the toffee flavor shine through without competing for attention. Stack the layers, frost between and on top, and garnish with extra toffee bits and a few crushed nuts for a finish that looks like you know what you're doing.
Storage and Make-Ahead Tips
The unfrosted cake layers will keep in an airtight container at room temperature for three days, though honestly they're best eaten within two days of baking when the texture is still tender and the toffee bits are at peak flavor. You can also wrap them well and freeze them for up to three months, which is a lifesaver if you want to bake ahead and frost closer to your event. If you do freeze them, thaw them at room temperature still wrapped so condensation doesn't turn them soggy.
Customization and Adaptations
The beauty of this cake is how willing it is to play nice with your dietary needs or flavor preferences without losing its charm or structure. I've made it with walnuts, pecans, almonds, and even with no nuts at all for friends with allergies, and each version was equally loved. For vegan and gluten-free versions, follow the substitutions in the ingredient list, and the cake turns out just as moist and flavorful as the original.
- Try swapping the toffee bits for chocolate chips, crushed butterscotch candies, or even dried cranberries if you're feeling adventurous.
- A pinch of cinnamon or a hint of espresso powder in the batter adds depth without being obvious.
- Make individual cupcakes instead of cake layers if you're serving a crowd and want less fuss—reduce baking time to 18 to 20 minutes.
 Save
Save This cake has become my go-to holiday gift and celebration dessert because it tastes thoughtful without being fussy, and it never fails to make people smile. I hope it becomes one of yours too.
Recipe Questions
- → What ingredients add the crunchy texture?
Chopped nuts such as pecans or walnuts contribute the crunchy texture in the cake.
- → Can this cake be made vegan?
Yes, by substituting butter with vegan butter and eggs with flaxseed meal or applesauce, the cake can be vegan-friendly.
- → How long should the cake bake?
Bake the cake for 25 to 30 minutes until a toothpick inserted in the center comes out clean.
- → Is it possible to make this gluten-free?
Absolutely, using a reputable gluten-free flour blend instead of all-purpose flour allows for gluten-free preparation.
- → How should the cake be stored after baking?
Store the cake in an airtight container at room temperature for up to three days, or refrigerate for up to one week.
- → What frosting pairs well with this cake?
Caramel or cream cheese frosting complements the flavors and adds extra richness to the cake.