 Save
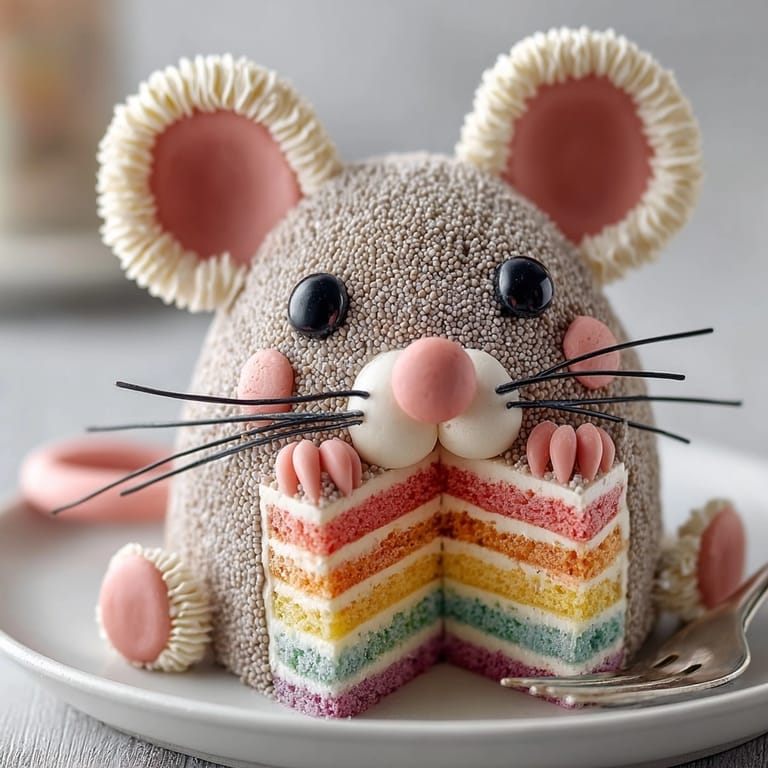
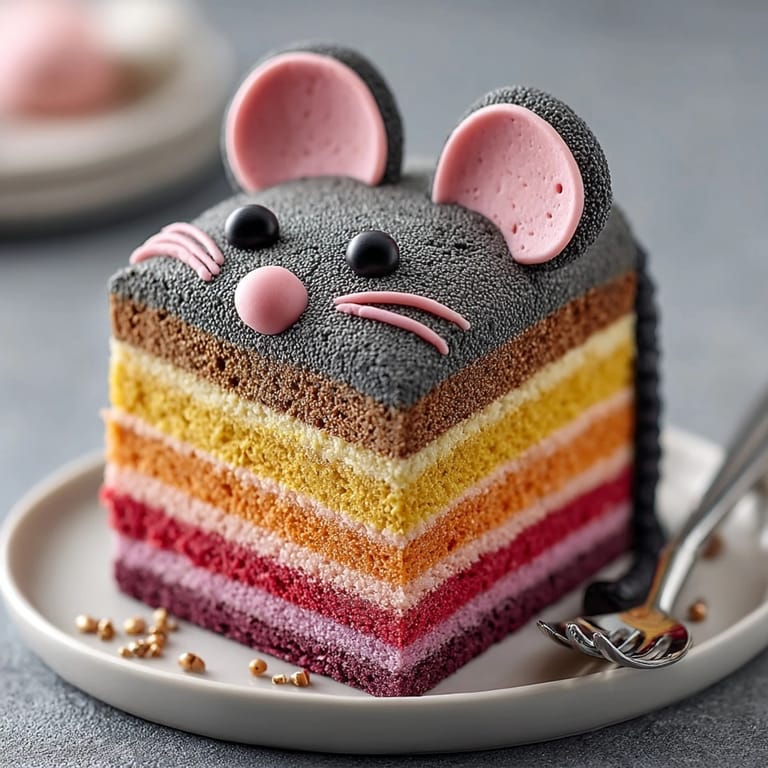
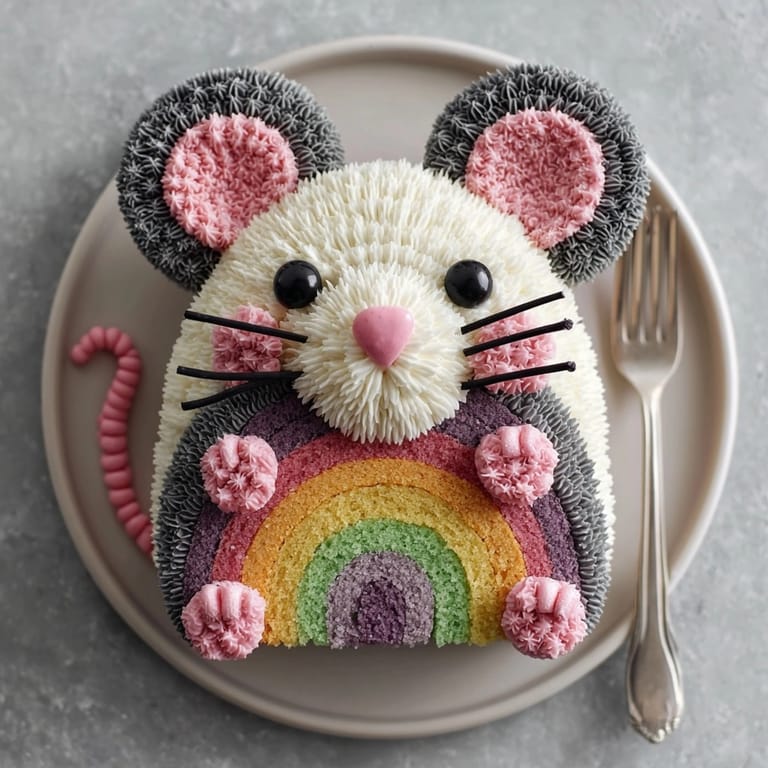
Save This Chaos Cake is the ultimate centerpiece for a birthday celebration that is anything but ordinary. Tender, vivid rainbow layers are expertly stacked and carved into a playful rat shape, then finished with fluffy gray buttercream and fondant details. It is a labor of love that delights both kids and adults, instantly sparking laughter and wonder.
For my daughter's last birthday, I made this cake on a whim thinking it would make everyone smile. The whole party ended up gathering around to see the first slice, and now no birthday feels complete without a Chaos Cake.
Ingredients
- All purpose flour: is what gives the cake structure. Sift for a fluffier crumb and check that it is not expired for the best rise
- Baking powder and baking soda: are the leaveners to ensure tall, tender layers. Make sure they are fresh
- Salt: balances the cake and highlights the other flavors
- Unsalted butter: must be at room temperature for smooth mixing and a plush cake crumb
- Granulated sugar: gives sweetness and helps aerate the batter when creamed with butter
- Eggs: add richness and help bind everything together. Use large eggs for accuracy
- Vanilla extract: provides an inviting aroma and warmth. Pure extract is best if you have it
- Whole milk: gives moisture and helps bring the batter together. Room temperature milk prevents curdling
- Gel food coloring: is essential for bold rainbow layers. Opt for gel instead of liquid for vibrant color without thinning your batter
- Powdered sugar: makes the buttercream smooth. Sift it first for a lump-free texture
- Fondant in white and pink: is used for the rat's adorable features. Go for quality fondant for best shaping and taste
- Black fondant pearls or mini chocolate chips: make quick (and edible) eyes
- Black licorice string: is flexible for tails and whiskers. Fresh makes it easier to shape
Tired of Takeout? 🥡
Get 10 meals you can make faster than delivery arrives. Seriously.
One email. No spam. Unsubscribe anytime.
Instructions
- Prepare the Cake Pans:
- Preheat your oven to 350 degrees Fahrenheit which is 175 degrees Celsius. Grease and line three six inch round cake pans with parchment paper. If you have only three pans you will bake the six layers in two batches.
- Mix Dry Ingredients:
- In a medium bowl whisk flour baking powder baking soda and salt together thoroughly until you see no streaks. This will help your cake rise evenly and every bite be perfectly seasoned.
- Cream Butter and Sugar:
- Beat room temperature butter and sugar in a large mixing bowl using a stand or hand mixer. Cream on medium high for several minutes until fluffy and pale. A good creaming traps air for a lighter cake.
- Add Eggs and Vanilla:
- Add eggs one by one beating well after each addition. Pour in vanilla and mix until just incorporated. This ensures the structure and even flavor throughout.
- Combine Wet and Dry:
- Add the dry ingredient mixture and milk in turns to the butter mixture. Start and end with dry. Do not overmix—blend until just combined for the tenderest layers.
- Color the Batter:
- Divide the batter evenly into six bowls. Tint each with a different gel food coloring for red orange yellow green blue and purple. Start with a little color and add more until each bowl is vibrant. Mix each bowl gently so you do not deflate the batter.
- Bake the Layers:
- Pour each colored batter into its own prepared pan. Smooth the tops. Bake for fifteen to eighteen minutes until a toothpick poked in the center comes out clean. Cool in the pans for five minutes then turn out to cool completely on racks.
- Make Buttercream:
- Beat butter until creamy and pale. Gradually add powdered sugar then pour in milk and vanilla. Beat on medium high until light and fluffy. Sifted sugar and patient beating makes this process smoother.
- Tint Buttercream:
- Separate portions of buttercream and tint them gray for the rat's body pink for features and black as needed. Gel loves buttercream so the colors are true and bold.
- Stack and Carve the Cake:
- If cake layers dome trim them flat with a serrated knife. Stack layers with a thin layer of buttercream between each. Once all are stacked use a serrated knife to carve a rough rat shape: rounded body tapered snout and haunches. Add cake scraps to build up the head and haunches if needed.
- Crumb Coat:
- Spread a thin layer of gray buttercream over the entire cake to trap crumbs. Chill the cake for twenty minutes which makes the final coat smoother to apply.
- Frost for Texture:
- Cover the chilled cake with a thicker layer of gray buttercream. Use a small offset spatula or fork to create a "furry" look. Pull the icing in short strokes to imitate a rat's coat.
- Add Fondant Details:
- Shape white and pink fondant into ears nose and stubby feet. Use pink fondant or tint some with food coloring for the inner ears and nose tip. Attach with a dab of buttercream where each part should go.
- Finish the Face:
- Place black fondant pearls or mini chocolate chips for eyes. Cut and position the black licorice for the tail and whiskers. Use pink buttercream for the nose and pipe dots for highlights. Add playful touches or extra details as you like.
 Save
Save When I made Chaos Cake for my best friend's birthday we laughed through the whole assembly. The fondant ears came out crooked but those goofy touches made it even more special. Gray buttercream is my favorite to make—I love swirling in a touch of blue and black to get just the right rat-like shade.
Storage Tips
After decorating chill the cake to set the buttercream before storing. If you have leftovers slice and wrap them tightly in plastic then pop into an airtight container. Kept chilled they will stay fresh and moist for four to five days. Rainbow layers dry out more slowly than delicate sponge cakes. For longer storage freeze slices on a baking sheet first then wrap tightly and freeze up to two months.
Ingredient Substitutions
You can use plant based butter and a quality dairy free milk if you need this cake to be completely dairy free. For eggs use your favorite egg substitute powder for a similar rich crumb. Instead of fondant you can shape rat features from marzipan or use modeling chocolate for a more kid friendly sugary finish.
Serving Suggestions
Set up the Chaos Cake as the birthday table centerpiece and surround it with more rainbow treats like fruit skewers or sprinkle sugar cookies. For a birthday toast offer Moscato or lemonade. Consider individual candles for each layer so guests can make a collective wish.
Cultural and Historical Context
Animal shaped cakes have long been a part of celebrations around the world. They bridge playful creativity and baking skill. Rainbow cakes symbolize joy hope and diversity and are a popular trend for kid and grown up birthday parties alike. The rat shape here has often been used for good luck in many cultures and makes for a memorable birthday surprise.
Seasonal Adaptations
Swap rainbow colors for an ombre pink to red look for Valentine's Day Use green and gold frosting for a fun St Patrick's Day rat Layer citrus zest into the batter for a springy bright flavor
Success Stories
I have seen friends who never thought they could sculpt a cake get incredible results by following the carving instructions step by step. Kids adore adding their own detail touches so let them help with fondant feet and licorice tails. The best part is that imperfections truly add to the cake's charm everyone remembers it long after the candles are blown out.
Freezer Meal Conversion
Wrap each unfrosted baked cake layer tightly in plastic and freeze. Make buttercream ahead and chill in a tub. When ready to assemble defrost overnight and decorate fresh—this makes birthday week much less stressful.
 Save
Save Chaos Cake is about joy and celebration. Enjoy every bright slice and the laughter this whimsical centerpiece brings.
Recipe Questions
- → How are the rainbow layers made?
The batter is divided into six bowls, each tinted with a different gel food color. Each color is baked separately for vibrant layers.
- → How do you shape the cake like a rat?
After stacking the layers with buttercream, the cake is carved into a rounded body, tapered snout, and small haunches using a serrated knife.
- → What kind of frosting is used?
A classic buttercream frosting is colored gray for the body, pink for details, and black as needed, creating texture and definition.
- → Can the cake be made ahead?
Yes, the cake layers and frosting can be prepared a day in advance and refrigerated. Assemble and decorate close to serving time.
- → Are there any tips for easier assembly?
Chill the cake layers before carving and frosting to reduce crumbs. Use gloves for handling colored fondant and details.
- → Is this suitable for vegetarians?
Yes, the cake is vegetarian. Always check fondant and food colorings for additional ingredients as needed.